First Game (Beginning)

Now that I’ve got a nice little development setup to work with It’s finally time to start making the games. The first on the list is the 2d puzzle platformer with two independently controlled players.

I’m going to cheese this one a bit by making use of the assets and code from the tutorial game and build upon it, I’ll just need to work on implementing it with my development space and see how that works.

I managed to split this up into two files, putting the config for the game in index.js and the other parts for it (preload(), create() etc) have been put in a scene.js file stored in a scenes folder for use of later. It didn’t end up working initally since the code was unable to find the collectStar() function in the same way it did when everything was stored in the one html file. The exporting and importing that I’m doing for the scene as a class is probably what’s interferring with it, however setting the reference of collectStar() to this.collectStar() fixes the issues the code was having with finding the function (which would now be a method since it’s contained with a class).

Great I have the tutorial working in my setup fine, now it’s time to figure out how to define the keys used for the controls so that I can have one player controlled with WASD and the other with the arrow keys. After searching through the API documentation I found exactly what I was looking for: this.input.keyboard.addKeys(‘W,S,A,D”); Now in the update function where the controls were being put in as left.isDown it can be changed to A.isDown.

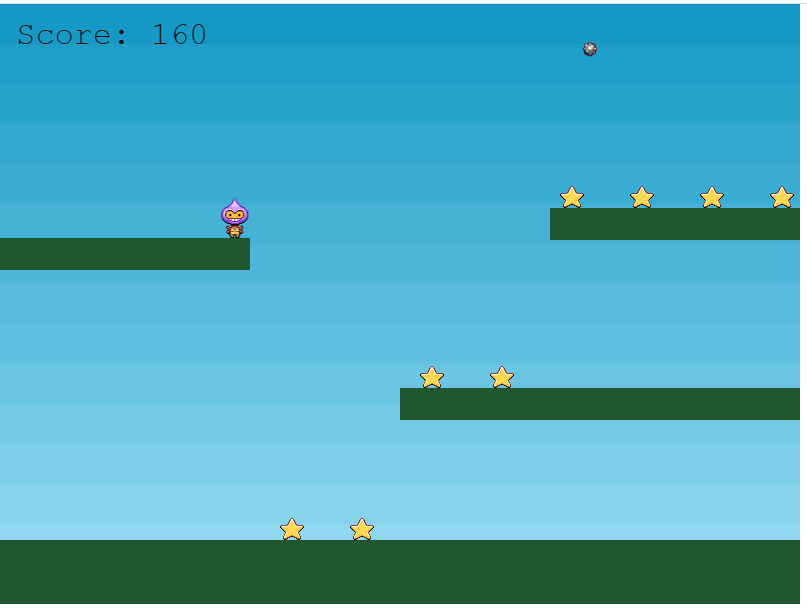
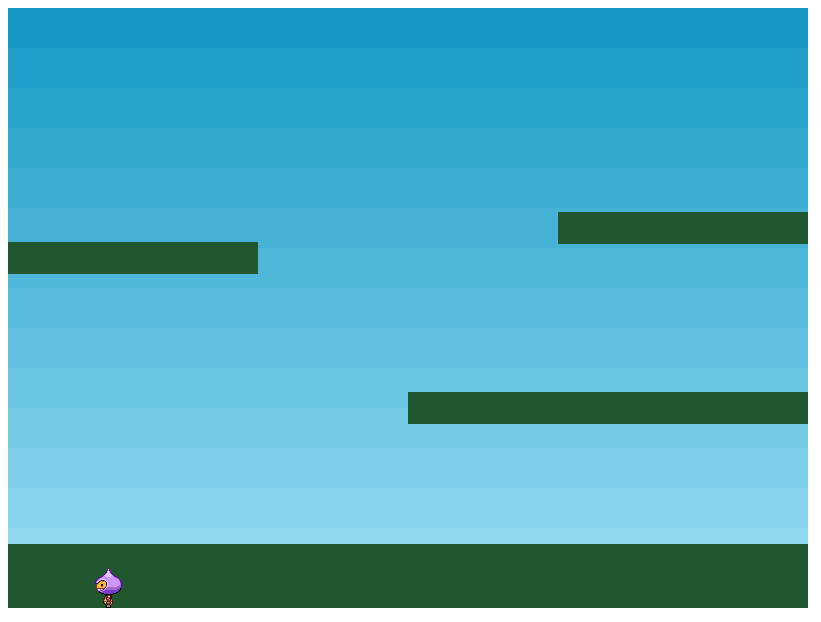
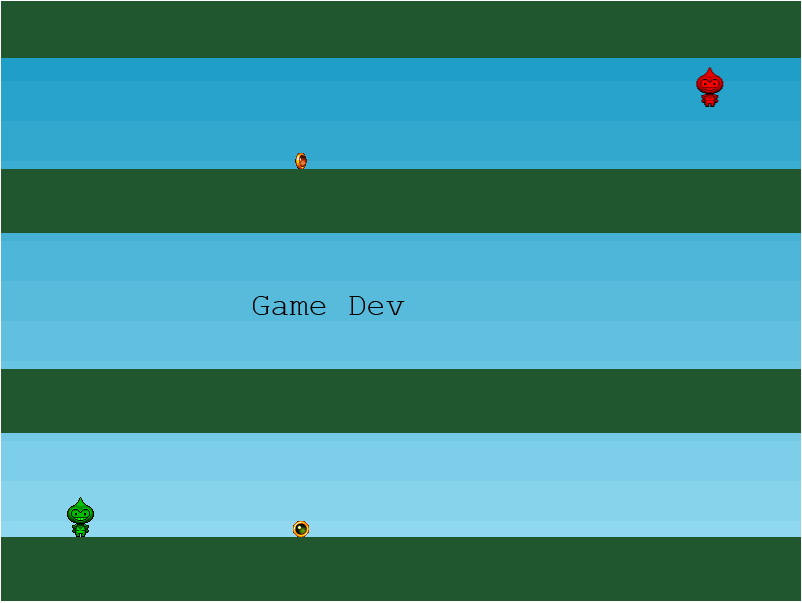
Now with that set I went on to create a second player, altering the code where needed and set different tints to them and seperate controls. I’ve also played about with the platforms and added a pickup for each player that can only be picked up if it corresponds with their colour. Overall it’s a decent base for the game now which looks a bit like this:

Next up is to work on scene switching and a bit of level design so that it starts getting it’s puzzle aspect which will mostly be playing about with doors that can only opened when one of the pickups are collected.

First game (Development Space)

Time to make my first game which will be the 2d puzzle game with two independently controlled players. Before that though I’m going to update my development setup, see if I can make an actual local server using nodeJS and Express and look into using webpack for bundling things and for automatically reloading the browser page whenever I make a change to the files.

After a week of messing about finding the best way to approach this I did initially find this article here that helped me wrap my head around webpack since it’s not something I had much knowledge of before. When I got to the end of this blog however and got everything working I found out that the webpack Hot Module Replacement ( The bit that refreshes the browser) doesn’t actually work with HTML files currently.

So I had to look for a new plan and conveniently enough I came across something called Webpack Dev Server while I was searching which does the work of Express and also has it’s own built in hot reloading feature that refreshes the browser when HTML files are changed this time. To help me get thing set up I found this helpful blog post and tweaked a few things based on it so I now have a development template setup for future games.

This all took a bit longer than I expected so I’m going to be happy to finally start making some games.

Starting out

Ok before I can get to the development stage I’ll need to setup my development environment so I can test my game locally. It looks like they have a list of suggestions to do choose from and handily using http-server with nodeJs is the one I was thinking of so I’ll start there.

So far so good, everything is setup now at least and I got to see a little bit of Phaser at work by following a neat little tutorial for getting things going development-wise. It looks like the structure at least is following the same lines from when I was using it In which they have 3 main functions: preload(), create() and update() (although this tutorial doesn’t go into update yet).

The preload() function is used to load in all your assets and the create() function is usually for setting them on the stage and allowing you to assign specific physics values to them. In this case it was used to set a velocity to the logo to keep it moving and to attach the red particles to follow along using built in methods.

Now comes the more enjoyable part though, putting together an actual game.

Now something more akin to a game is starting to take shape, however no velocity has been set to anything this time round so nothing is moving and bouncing about. This is where the update() function will come in handy as that’s where the actual movement for the little guy is going to come from.

And there we have it, one Phaser 3 tutorial happily completed. It’s quite a handy and informative tutorial which makes way more sense to me now that I have a few more years experience with JavaScript so I’m getting more familiar with how stuff is slotting together. There are quite a few things I want to cover that I found pretty convenient and enjoyable to use but that’s best saved for the bits and progress that I show for the game I’m going to be working on using Phaser 3 in my future posts.

Looking back to look ahead

Alright so I have used Phaser before but this was back in 2014 when it was barely a year old and still in its first version. While hoping that I can still jump back into it I am looking forward to seeing what’s changed since then with their shiny newish phaser 3.

Right off the bat anyway it looks like it’s using its own renderer this time round instead of making use of the PixiJS library. This does have me looking forward to other improvements they’ve made. To start though I’ll go through their standard Phaser 3 tutorial and cover it in my next post to see if it’s vastly different or just as I remember it being.

To finish off I’m shoehorning a couple of my thoughts here on what kind of games I could try making to start with. The first one should be easy enough as it’s going to be a 2d puzzle platformer which most of the groundwork will be covered in the tutorial. The twist here though is that it’s going to have 2 independently controlled characters with the WASD and arrow keys in order to solve the puzzles.

Next is either a small retro style top down rpg or a top down beat ’em up game which I haven’t actually figured out how that would work yet so it will probably be a sword slashy rpg unless something comes to mind when I’m working on the puzzle one.

Beginning Ramblings

This is a place where I’ve come to dump my thoughts so that they stop escaping me. I’m not sure what the main focus for this area will be but for the time I’ll be looking at using Phaser 3 to put games together.

First though I need to learn how to use it better so the start of this blog will mostly be me keeping track of what I’m learning. As with most new things the best option at the beginning is the tutorials so I’ll start there.

I’ll also need to work on making the blog look prettier but one thing at a time for now.

Design a site like this with WordPress.com
Get started